Microsoft has gone out of its way to make configuring a standard Email account difficult for reasons we will never understand. We have determined a way to deal with mail and Outlook configuration on Windows 10 that works but might seem silly at time. We have broken this down into the individual steps required. It isn't as bad as it looks as we have shown even the most simple screens:
Outlook 2016 and newer
Step 1
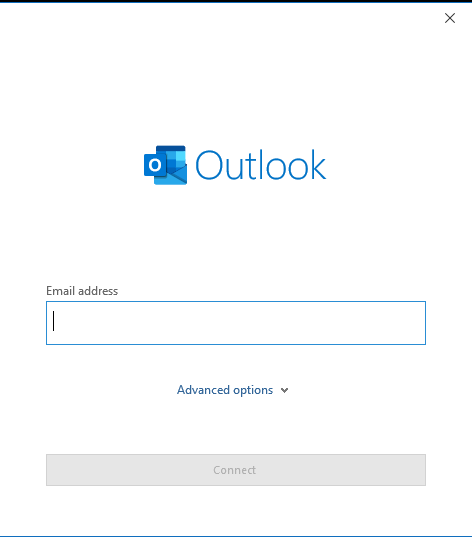
Start outlook. The new add account wizard should appear. Microsoft has broken this and it no longer works correctly.
Exit by pressing the "X" in the upper right corner of the dialog box.
You have start Outlook at least once to change the control panel icon from Windows Mail to Outlook.
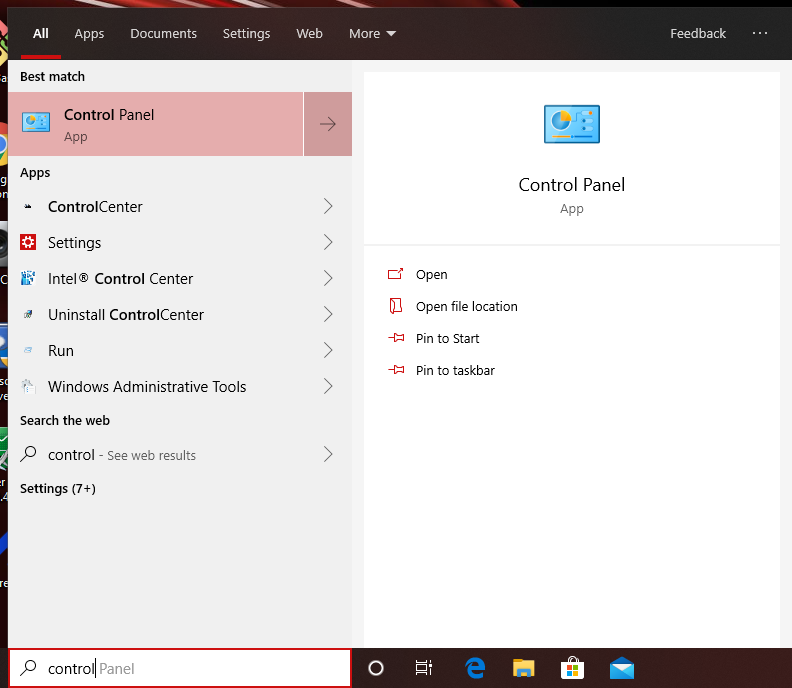
Step 2
Type "control" into the windows search box and select "Control Panel App" from the results.
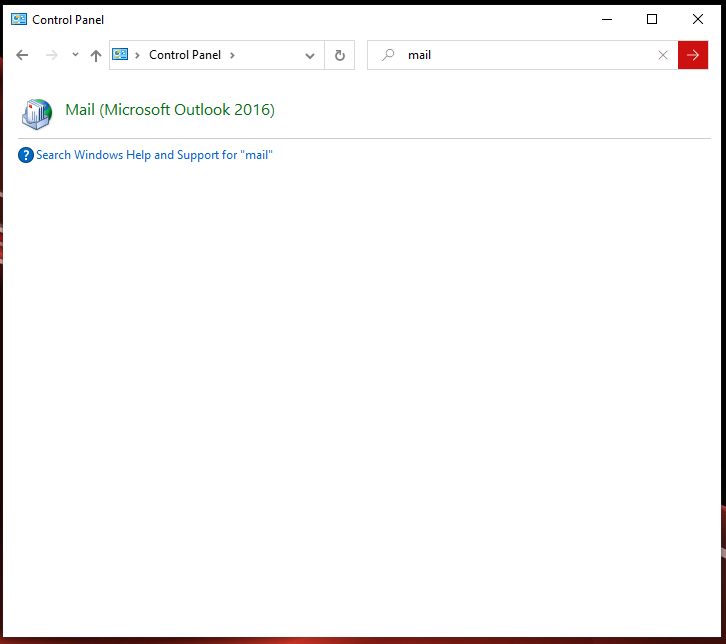
Step 3
Enter "Mail" in the Search Control Panel box. Select the Mail Icon, it should say Mail (Microsoft Outlook 20xx) or similar.
Step 4
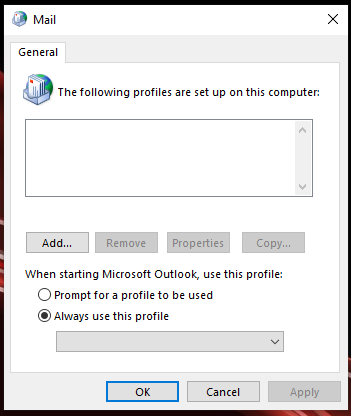
The Mail Control Panel App should appear.
Step 5

If this is the first account added to Outlook, create a profile by Clicking on the Add.. button and entering a new profile name, then click OK.
Step 6
This should open the Add Account Wizard, check "Manual setup or additional server type."
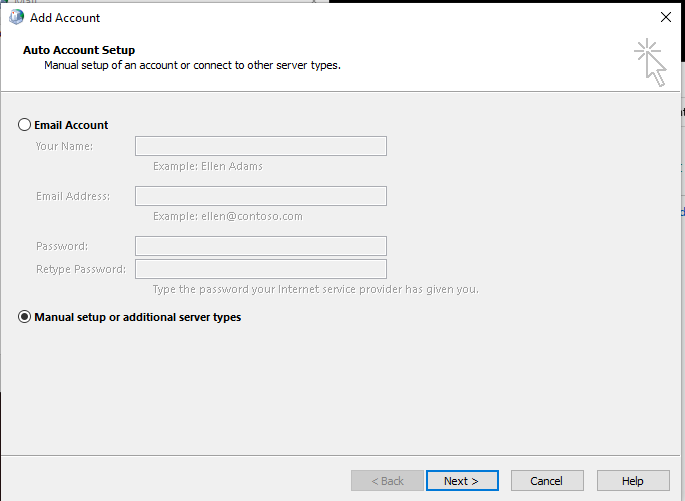
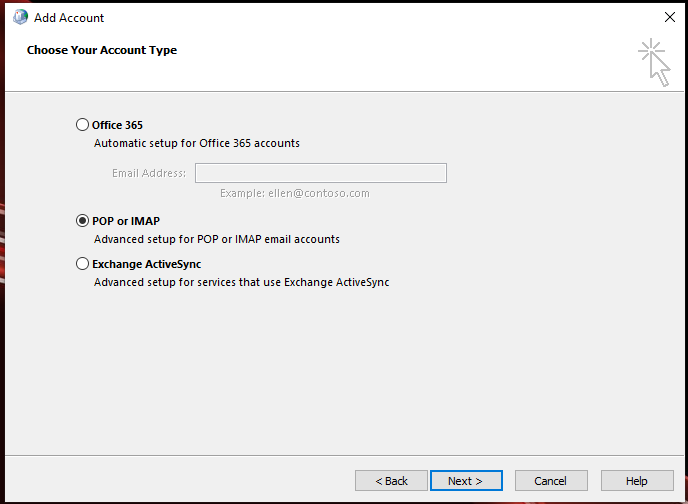
Step 7
Select POP or IMAP and press NEXT
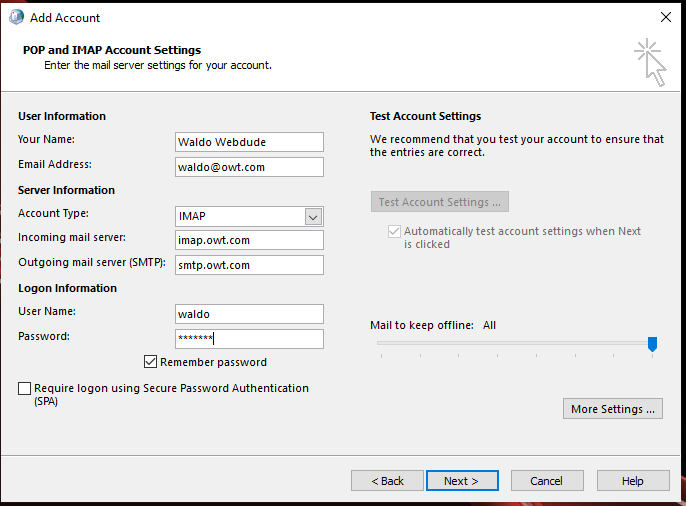
Step 8
Enter the User information as shown. Remember password should be checked.
Require logon using Secure Password Authentication (SPA ) MUST NOT BE CHECKED!
Click on the "More Settings..." button.
Step 9
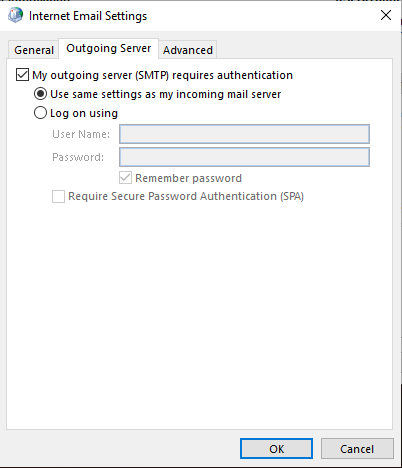
Click on the second tab labeled "Outgoing Server".
Check the first box "My outgoing server (SMTP) requires authentication".
"Use same settings as my incoming mail server" should be selected as well.
Step 10
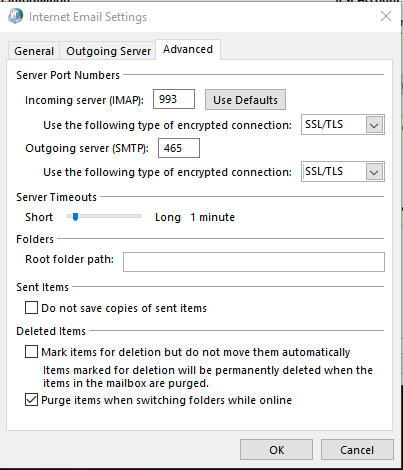
Click on the third tab labeled "Advanced"
Select the "SSL/TLS" option for both the IMAP and SMTP "Use the following type of encrypted connection:" dropdown boxes.
Enter 993 in the "Incoming serve (IMAP):" box if it is not already set to 993.
Enter 465 in the "Outgoing server (SMTP):" box.
Then click the "OK" button.
Step 11
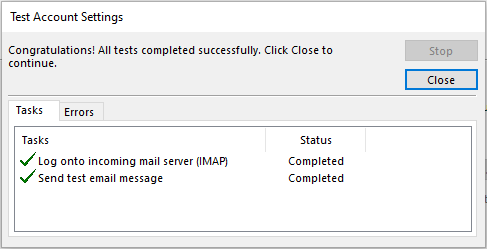
Outlook will try to send and receive an email with the new settings. If you do not receive the "Congratulations! All tests completed successfully." message, re-check your settings, one of them is wrong or mistyped.
Press the "Close" button.
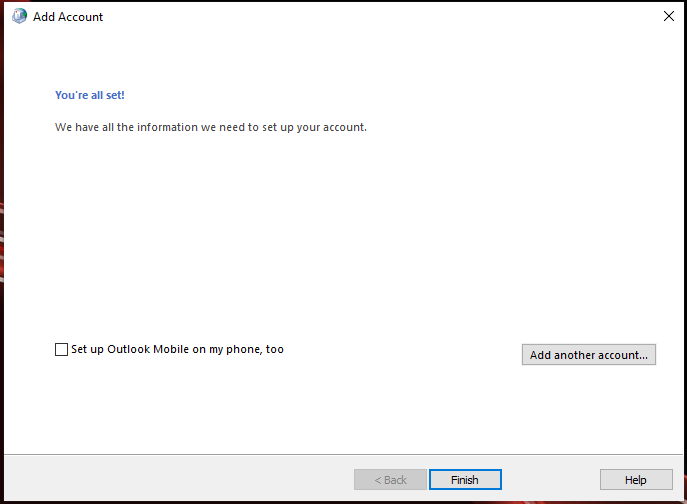
Step 12
Uncheck the "Set up Outlook Mobile on my phone, too" box.
Use the "Add another account..." button if you need to ad another account, otherwise press the "Finish" button.
Step 13

Press the "OK" button to exit the Mail Control Panel App.
Outlook is now configured for your email account(s).