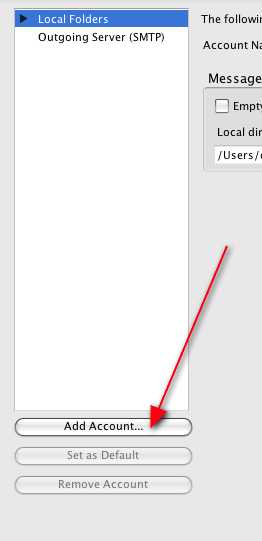
From the Tools menu select Account Settings. THen from the settings dialog click on Add Account.
From the Tools menu select Account Settings. THen from the settings dialog click on Add Account.
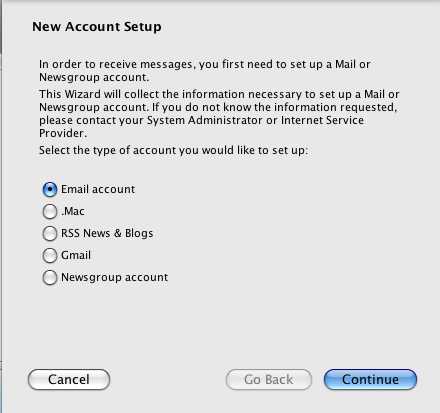
Select Email account and click Continue.
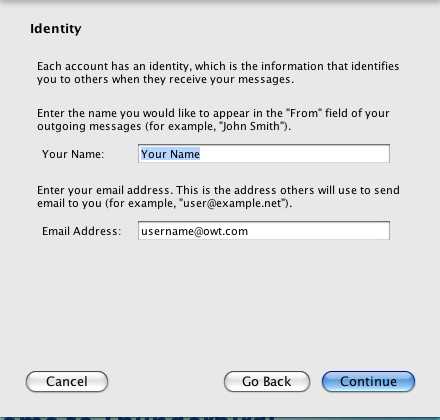
Enter your name in the Your Name field and the Email address given to you by OWT (note this may not be @owt.com) Click Continue.

For most users you will setup a POP3 account. Select POP from the server type menu. Enter the Incoming Server as pop3.owt.com (for POP or IMAP) The Global Inbox option is best checked but is up to you. Enter the Outgoing Server a smtp.owt.com Click Continue.
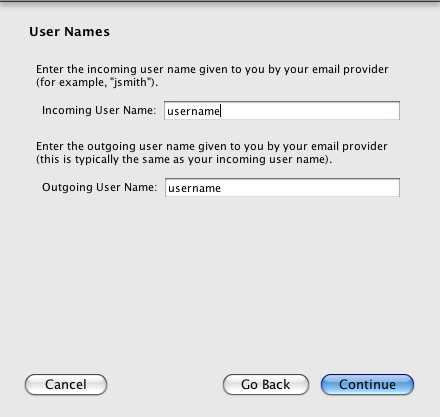
Enter your username as given to you by OWT (note there is no @ or any domain component in your username) for both the incoming AND outgoing usernames. Click Continue.
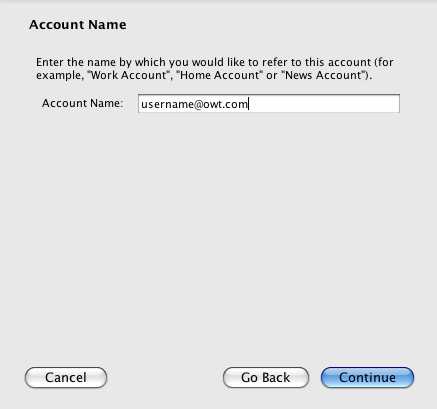
The Account name is really up to you but we suggest just putting your Email address in that field. Click Continue.

The next screen just summarizes what you have already entered. Click Done.
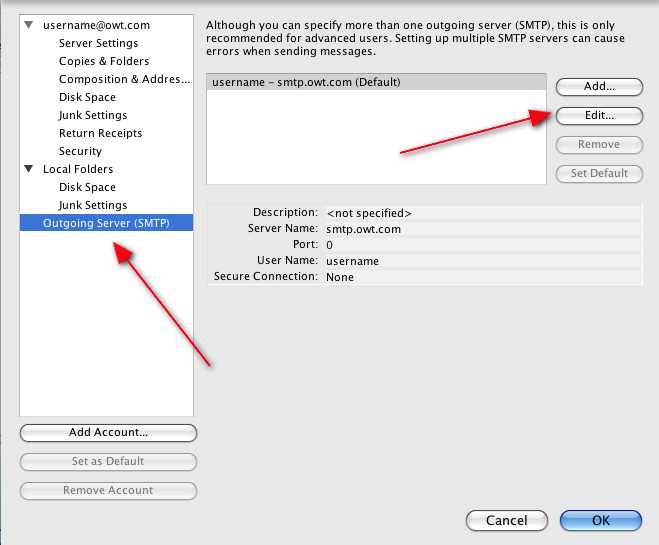
The next step is recommended but not required unless you travel with your computer or use another provider to access the Internet other than OWT. We suggest everyone proceed with this step just so that your Email always works. Select Outgoing Servers from the menu on the left. Select smtp.owt.com from the menu on the right and click Edit.
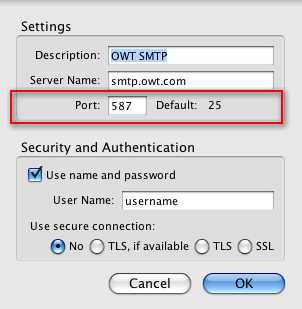
Here you can enter a description like "OWT SMTP". Server name should already be smtp.owt.clm The Port should be set to 587 so that it will work with providers (eg. Charter, Verizon) that block the standard SMTP port 25. Check the Use name and password box. Enter your username in the User Name field. Click OK. That's it! You are ready to test. Thunderbird probably already tried to access your mail and asked you for your password which it will save if you tell it to. Send a test message and it will do the same.