QR Code
OWT Technical Support       https://support.owt.com

Windows 8 Mail

Windows 8 brings many advancements but, sadly, Email is not one of them.  The built-in mail client in Windows 8 inexplicably does not support POP3 Email.  For mobile devices only supporting IMAP is fine but at some point you can't leave Email on our servers indefinitely and so you need to remove Email from our servers and store this Email locally on your computer.   This is easily accomplished with POP3 but can be more challenging with IMAP.  For this reason we generally recommend that desktop computers use POP3 and mobile devices use IMAP.  

NOTE: Windows Mail is not a full-featured client and frankly is terrible if you need to send and receive attachments.  If you are looking for a free mail client for Windows 7 or especially 8 we recommend Thunderbird

We will try to help you sort out your Email options but for now we'll show you how to setup IMAP using Windows 8 Mail.  

Step 1

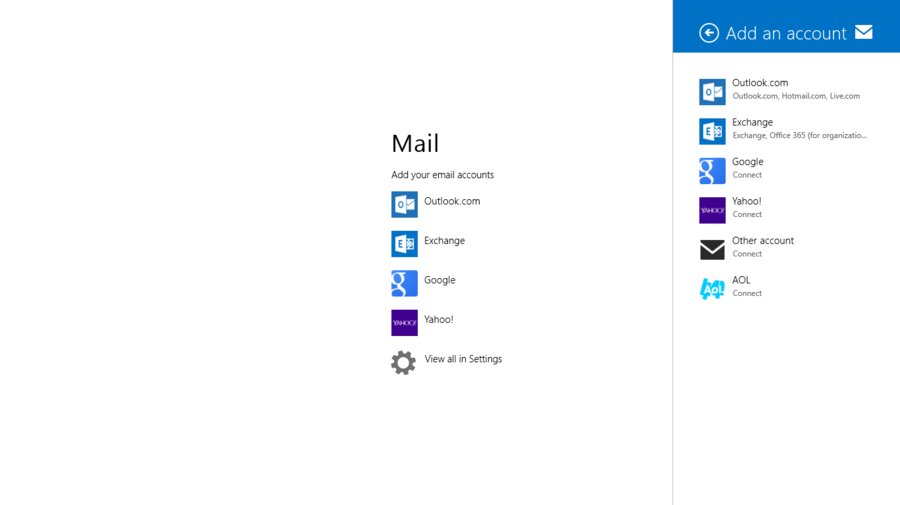
Well discuss some of these options in another section but for now you are going to add your OWT account to Windows 8 Mail.  Click on "View all in Settings".

Step 2

Pretty much the same screen but now click on the "Other account" option. 

Step 3

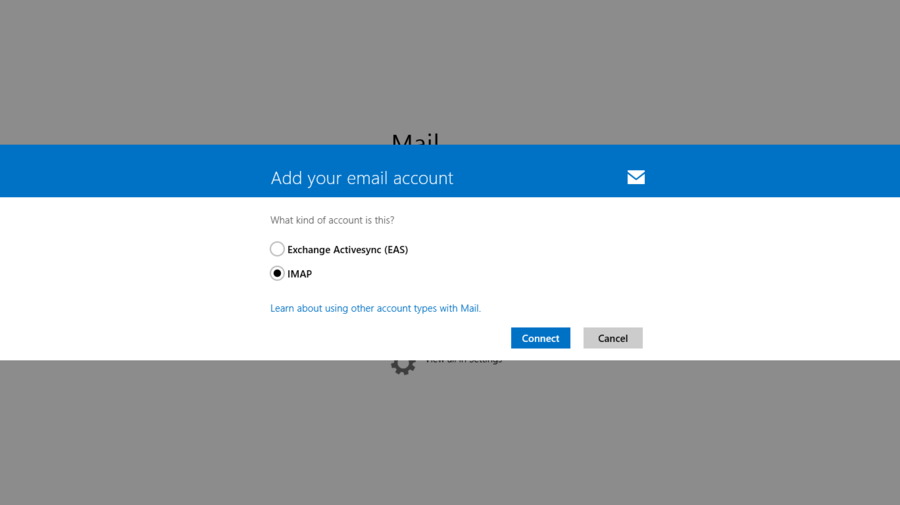
Select the Account Type as IMAP. 

Step 4

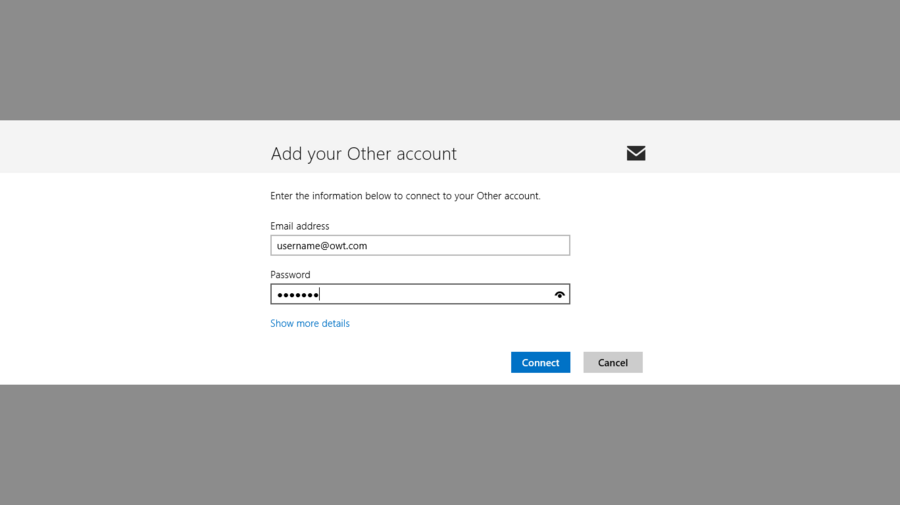
Enter your full Email address (case is not important) in the Email address field.  

Enter your password (case IS important) in the Password field and click Connect. It will fail to connect but it will then show you the full details screen. 

Step 5

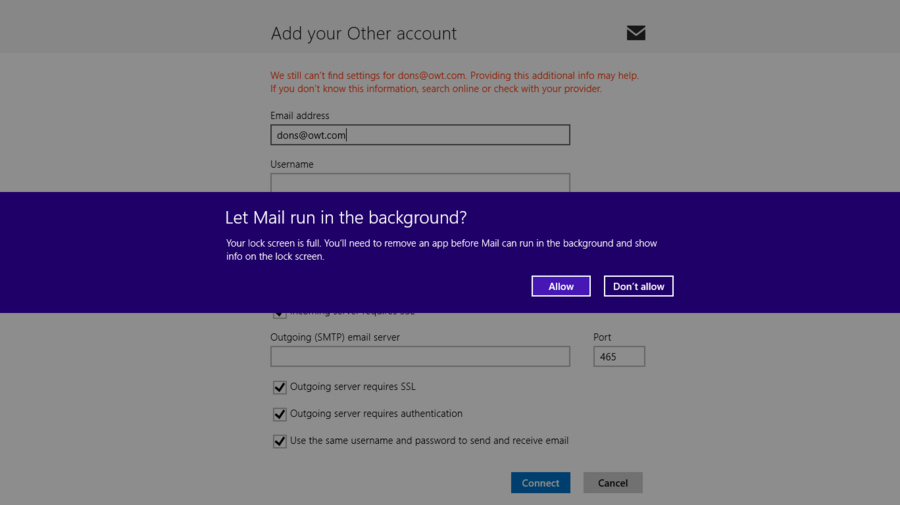
It will now ask you if you want Mail to run in the background if your lock screen is full (which seems to be pretty common).   If you want to show updated Email information on the lock screen then you want to allow this but if not just click Don't Allow. 

Step 6

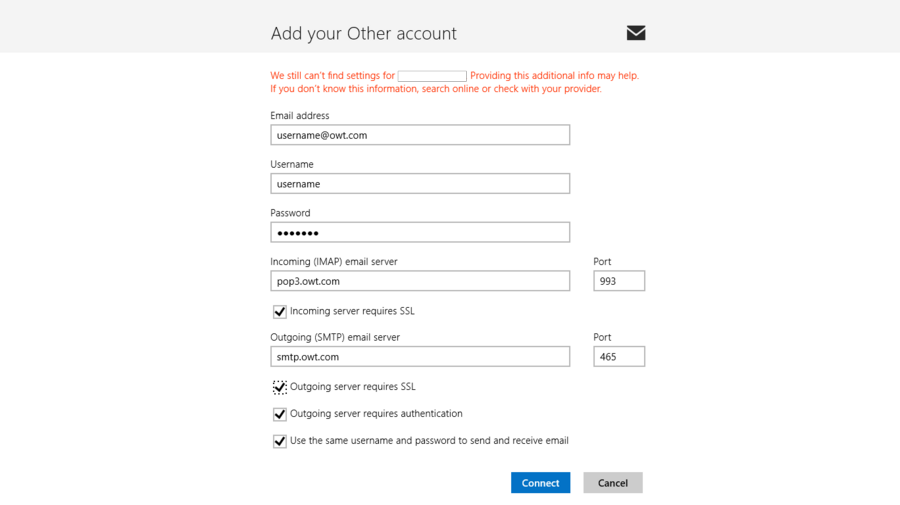
Here is where we enter most everything.  

Email address should already be filled in with your full Email address.

Username is your OWT username that may or may not be the first portion of your Email address.  OWT will have provided you with this information. 

Password should already be filled in.

Incoming (IMAP) email server:  set this to pop3.owt.com 

Check the box Incoming server requires SSL (it isn't actually required but it is a good idea). 

Outgoing (SMTP) email server: set this to smtp.owt.com 

Check the box Outgoing server requires SSL (it isn't actually required but it is a good idea). 

NOTE: the Ports listed should sort themselves out when you check these boxes.  If your ISP blocks standard mail ports you MAY have to change the outoing mail port to 587.  

Check the box Outgoing server requires authentication

Check the box Use the same username and password to send and receive email


Now you can click the Connect button and it should work fine.